

- Answer product questions 24 x 7
- Surface order status, shipping updates, and more
- Pass Shopify customer and cart context to the assistant
- Support Shopify sales attribution
- Import Data
- Create Assistant
- Enable on Store
Prerequisites
For the Shopify app path, Crescendo stores the service URL, Org ID, and Assistant ID for the app. You do not need to paste those values into Shopify unless you override the default assistant or use the manual Liquid path.
Primary method: Install the Shopify app
- Open the Crescendo Shopify app install link.
- Approve the Shopify OAuth installation.
- Complete the Welcome to Crescendo for Shopify onboarding wizard:
- Wait for the onboarding page to show that the assistant is connected.
- Click Mark as Complete.
Configure the app embed
The Crescendo Assistant ships as a theme app embed — it lives under Theme settings → App embeds in the theme editor (the gear icon in the side panel, or the “Apps” tab on Online Store 2.0 themes). To re-open it after onboarding:- In Shopify Admin, open Online Store → Themes.
- Click Customize next to your current theme.
- Click the Theme settings (gear) icon, then open the App embeds tab.
- Find Crescendo Assistant and click it to expand its settings.
- Adjust the available settings.
- Save the theme.
If you need deeper control than the app embed offers, use the manual Liquid path:
Choose where the assistant appears
By default, the app embed appears on all storefront pages where the theme app embed is enabled. To include or exclude specific pages, ask Crescendo support to configure page rules for the assistant. These rules are not exposed in the Shopify app embed./pattern/flags is also accepted). disabledPages wins if both lists match. If enabledPages is not empty, the assistant is hidden unless a rule matches. Use anchored regex patterns like ^/products(/|$) to avoid unintended substring matches.
Advanced / Custom Theme
Use this custom flow when the Shopify app embed does not provide enough theme control.1 · Create the section c7o-bot-widget.liquid
- In Shopify Admin open Online Store → Themes.
- Find your Current theme, click … → Edit code.
- In the left sidebar, Add a new file under
sections. - Name the file
c7o-bot-widget.liquid.
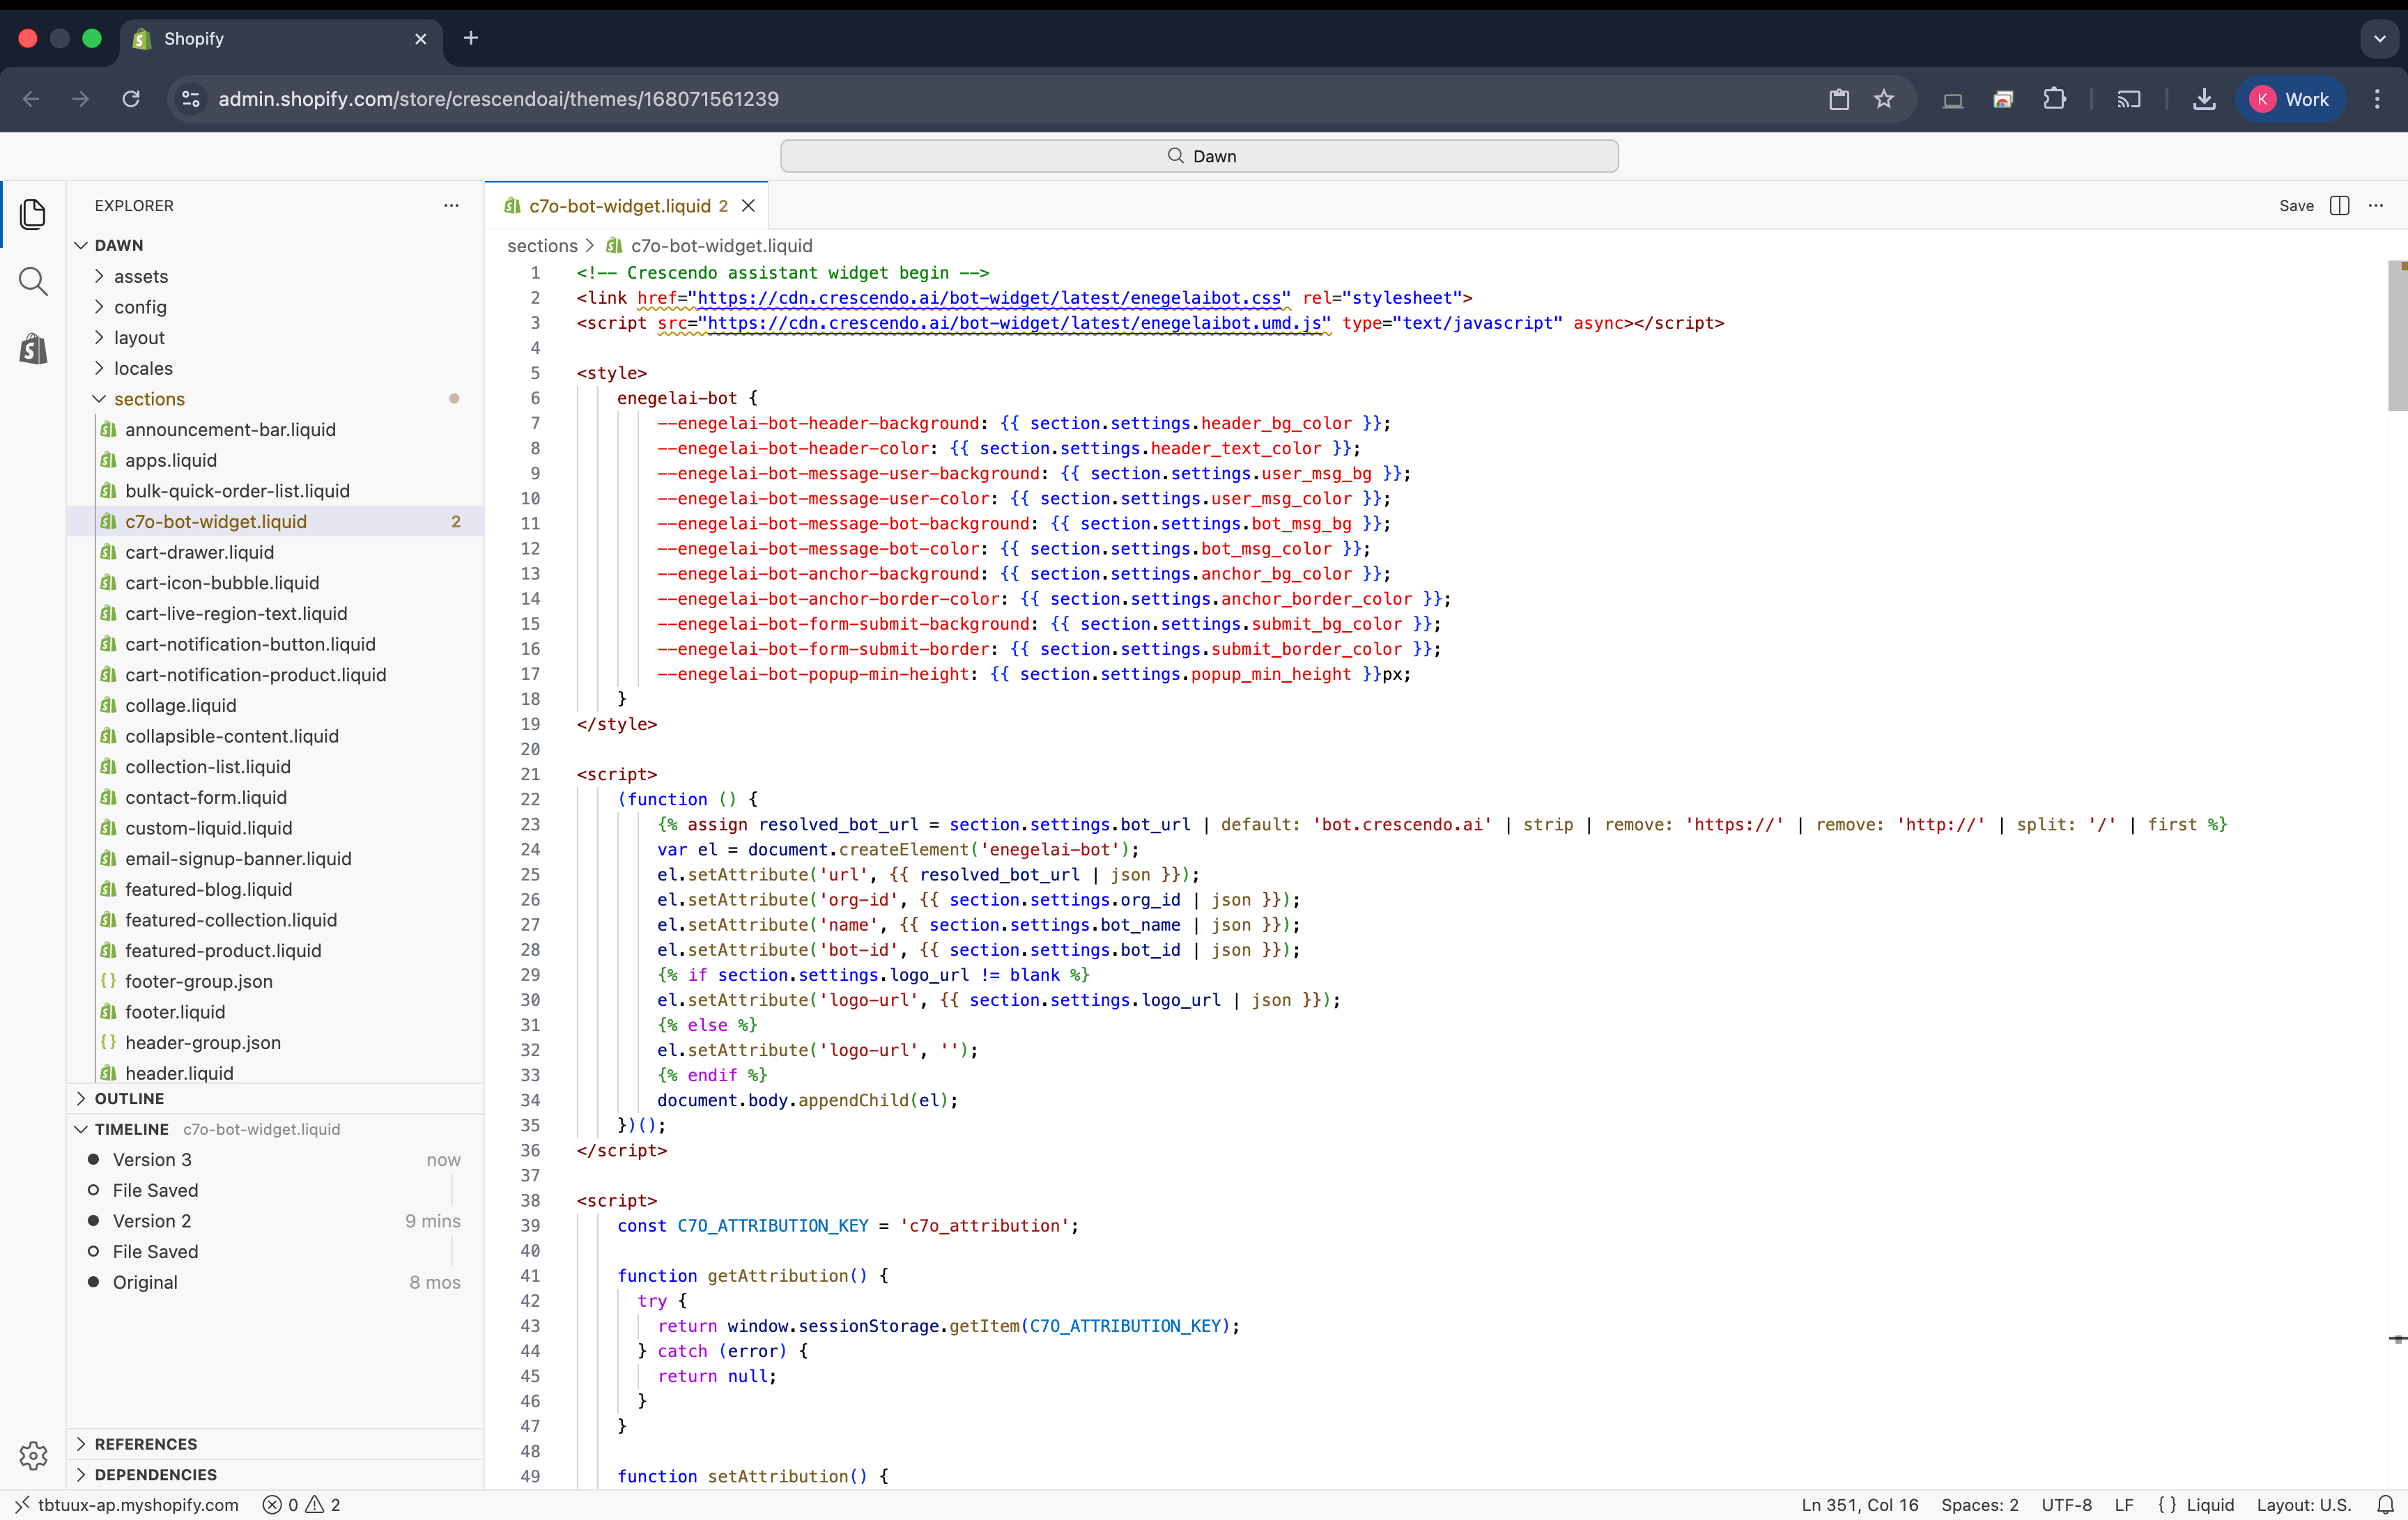
- Replace the empty file with the code below:
- Save the file.
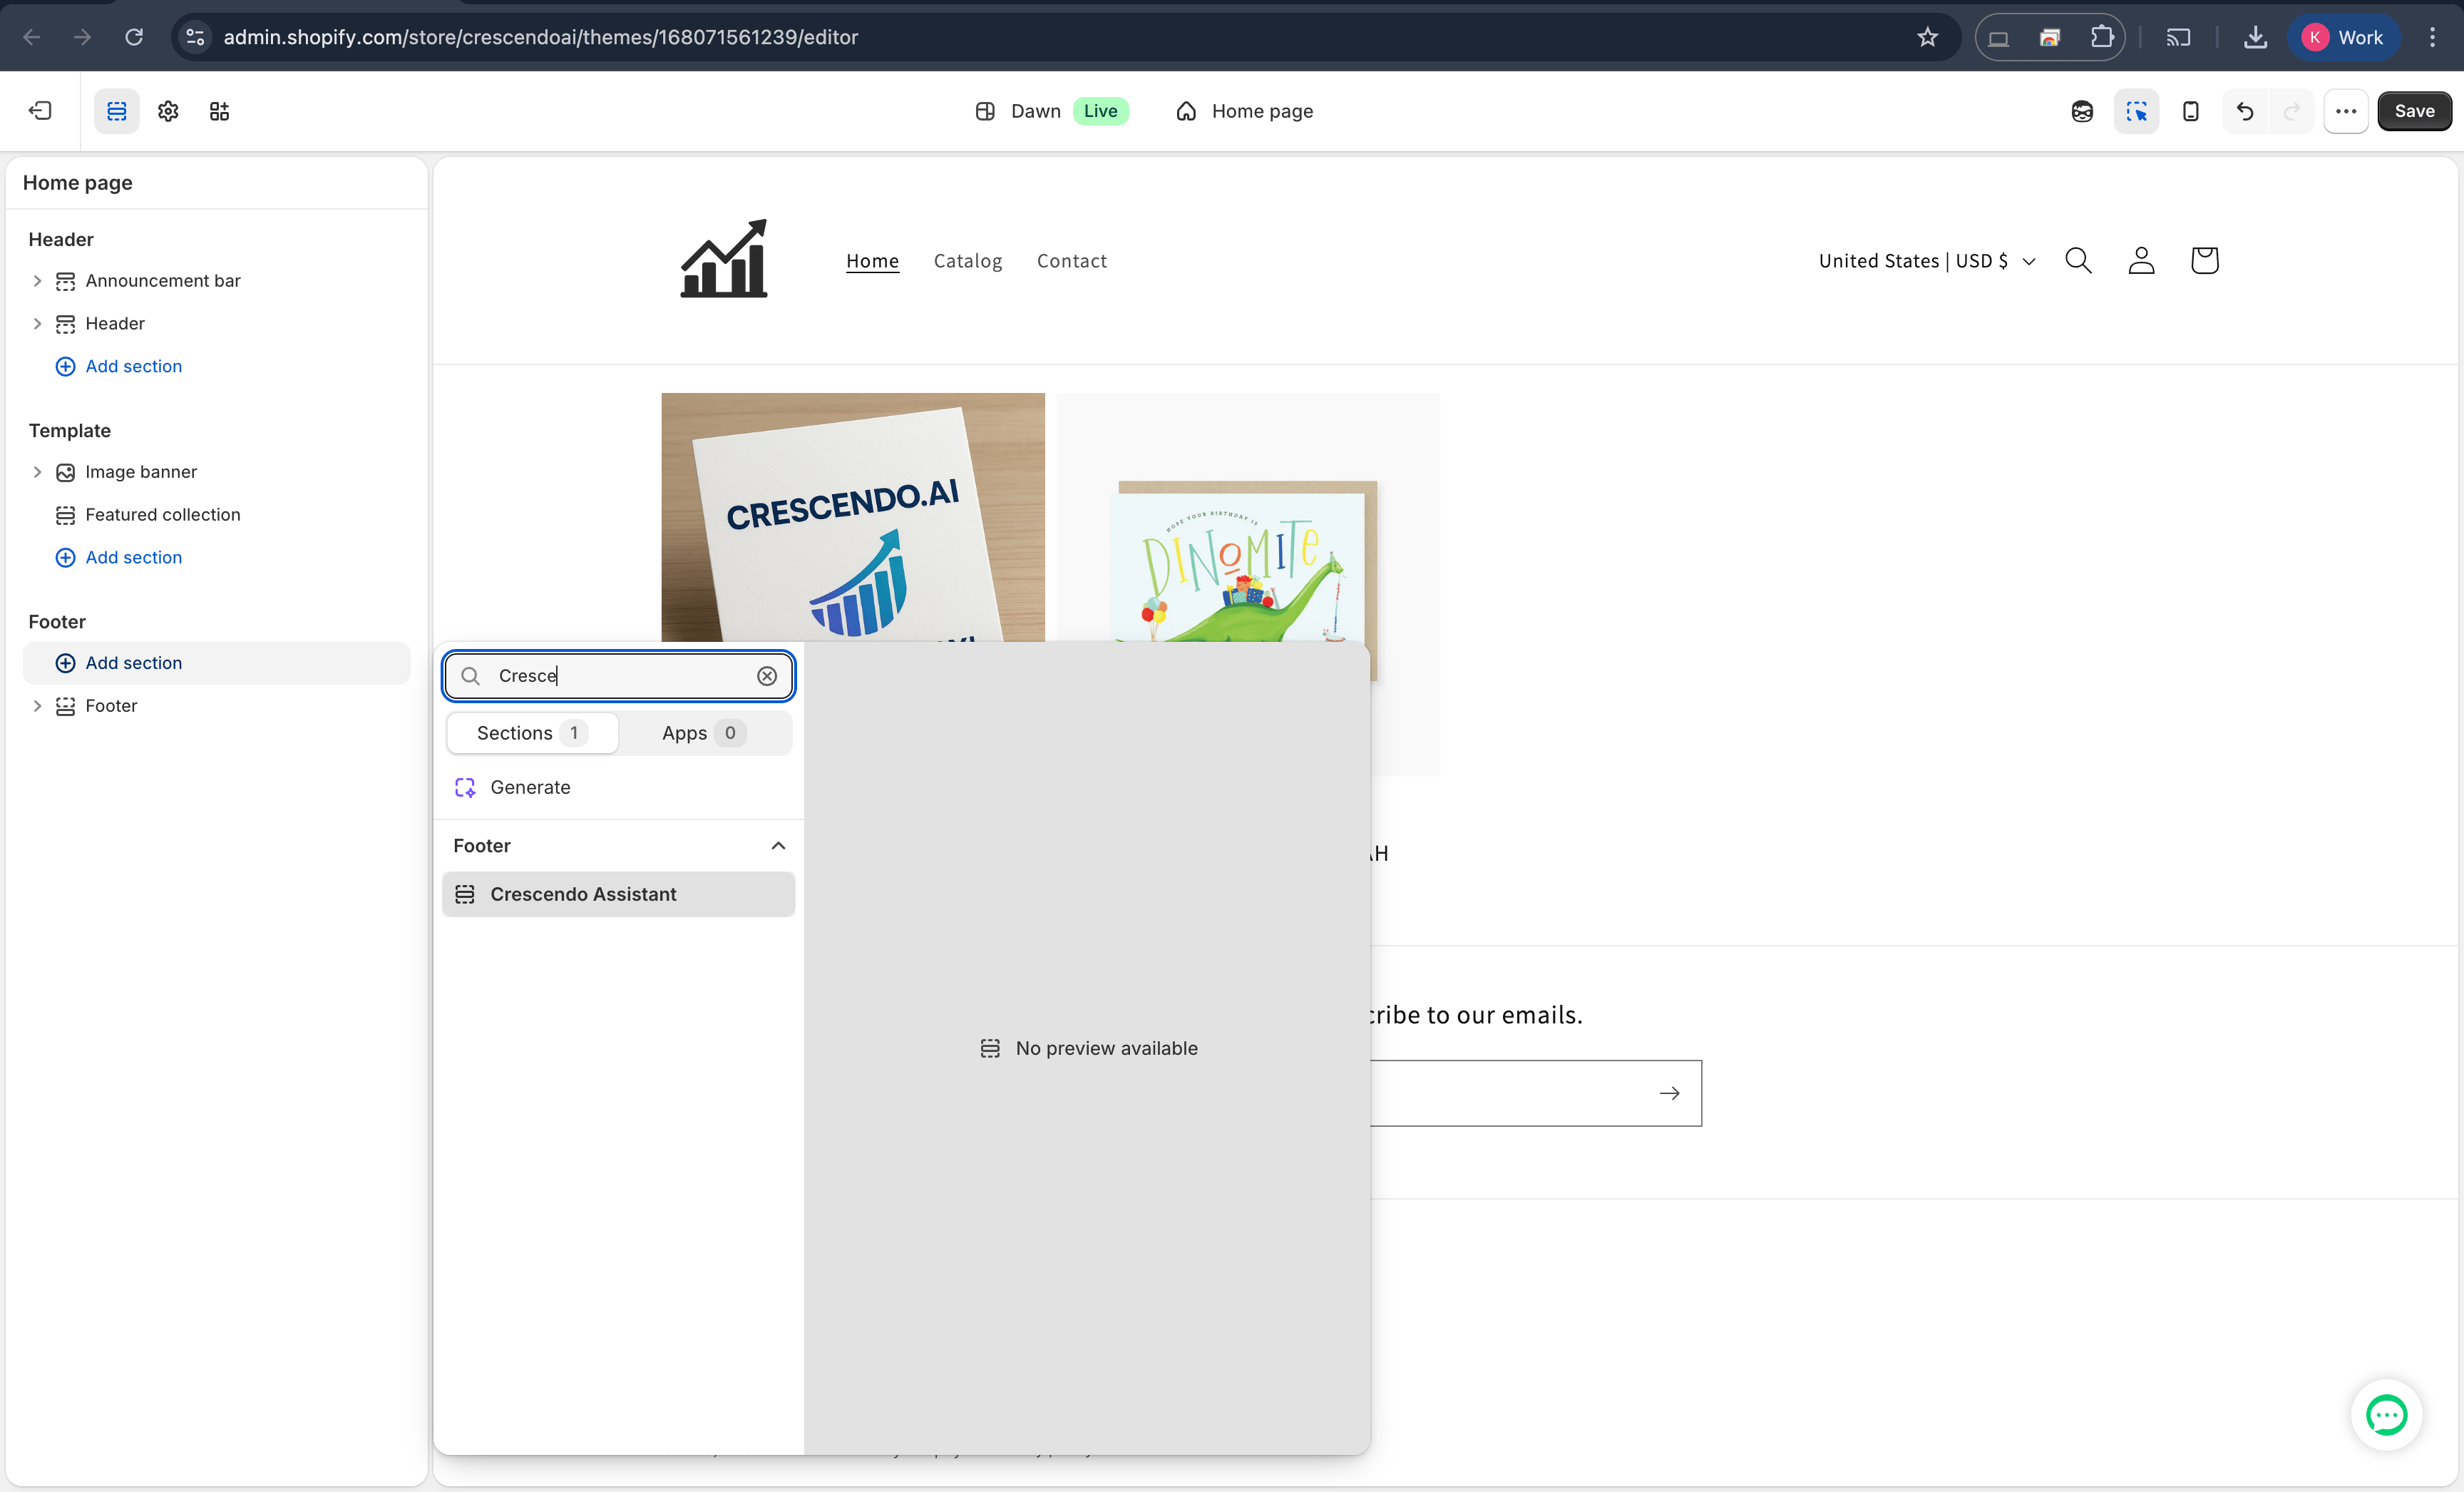
2 · Add the section to the Footer
- Click Customize next to your theme.
- In the left panel, scroll down and select Footer.
- Click Add Section, then choose Crescendo Assistant (filed under the Footer category in the picker).
- Save the theme.
3 · Enter your Org ID and Assistant ID
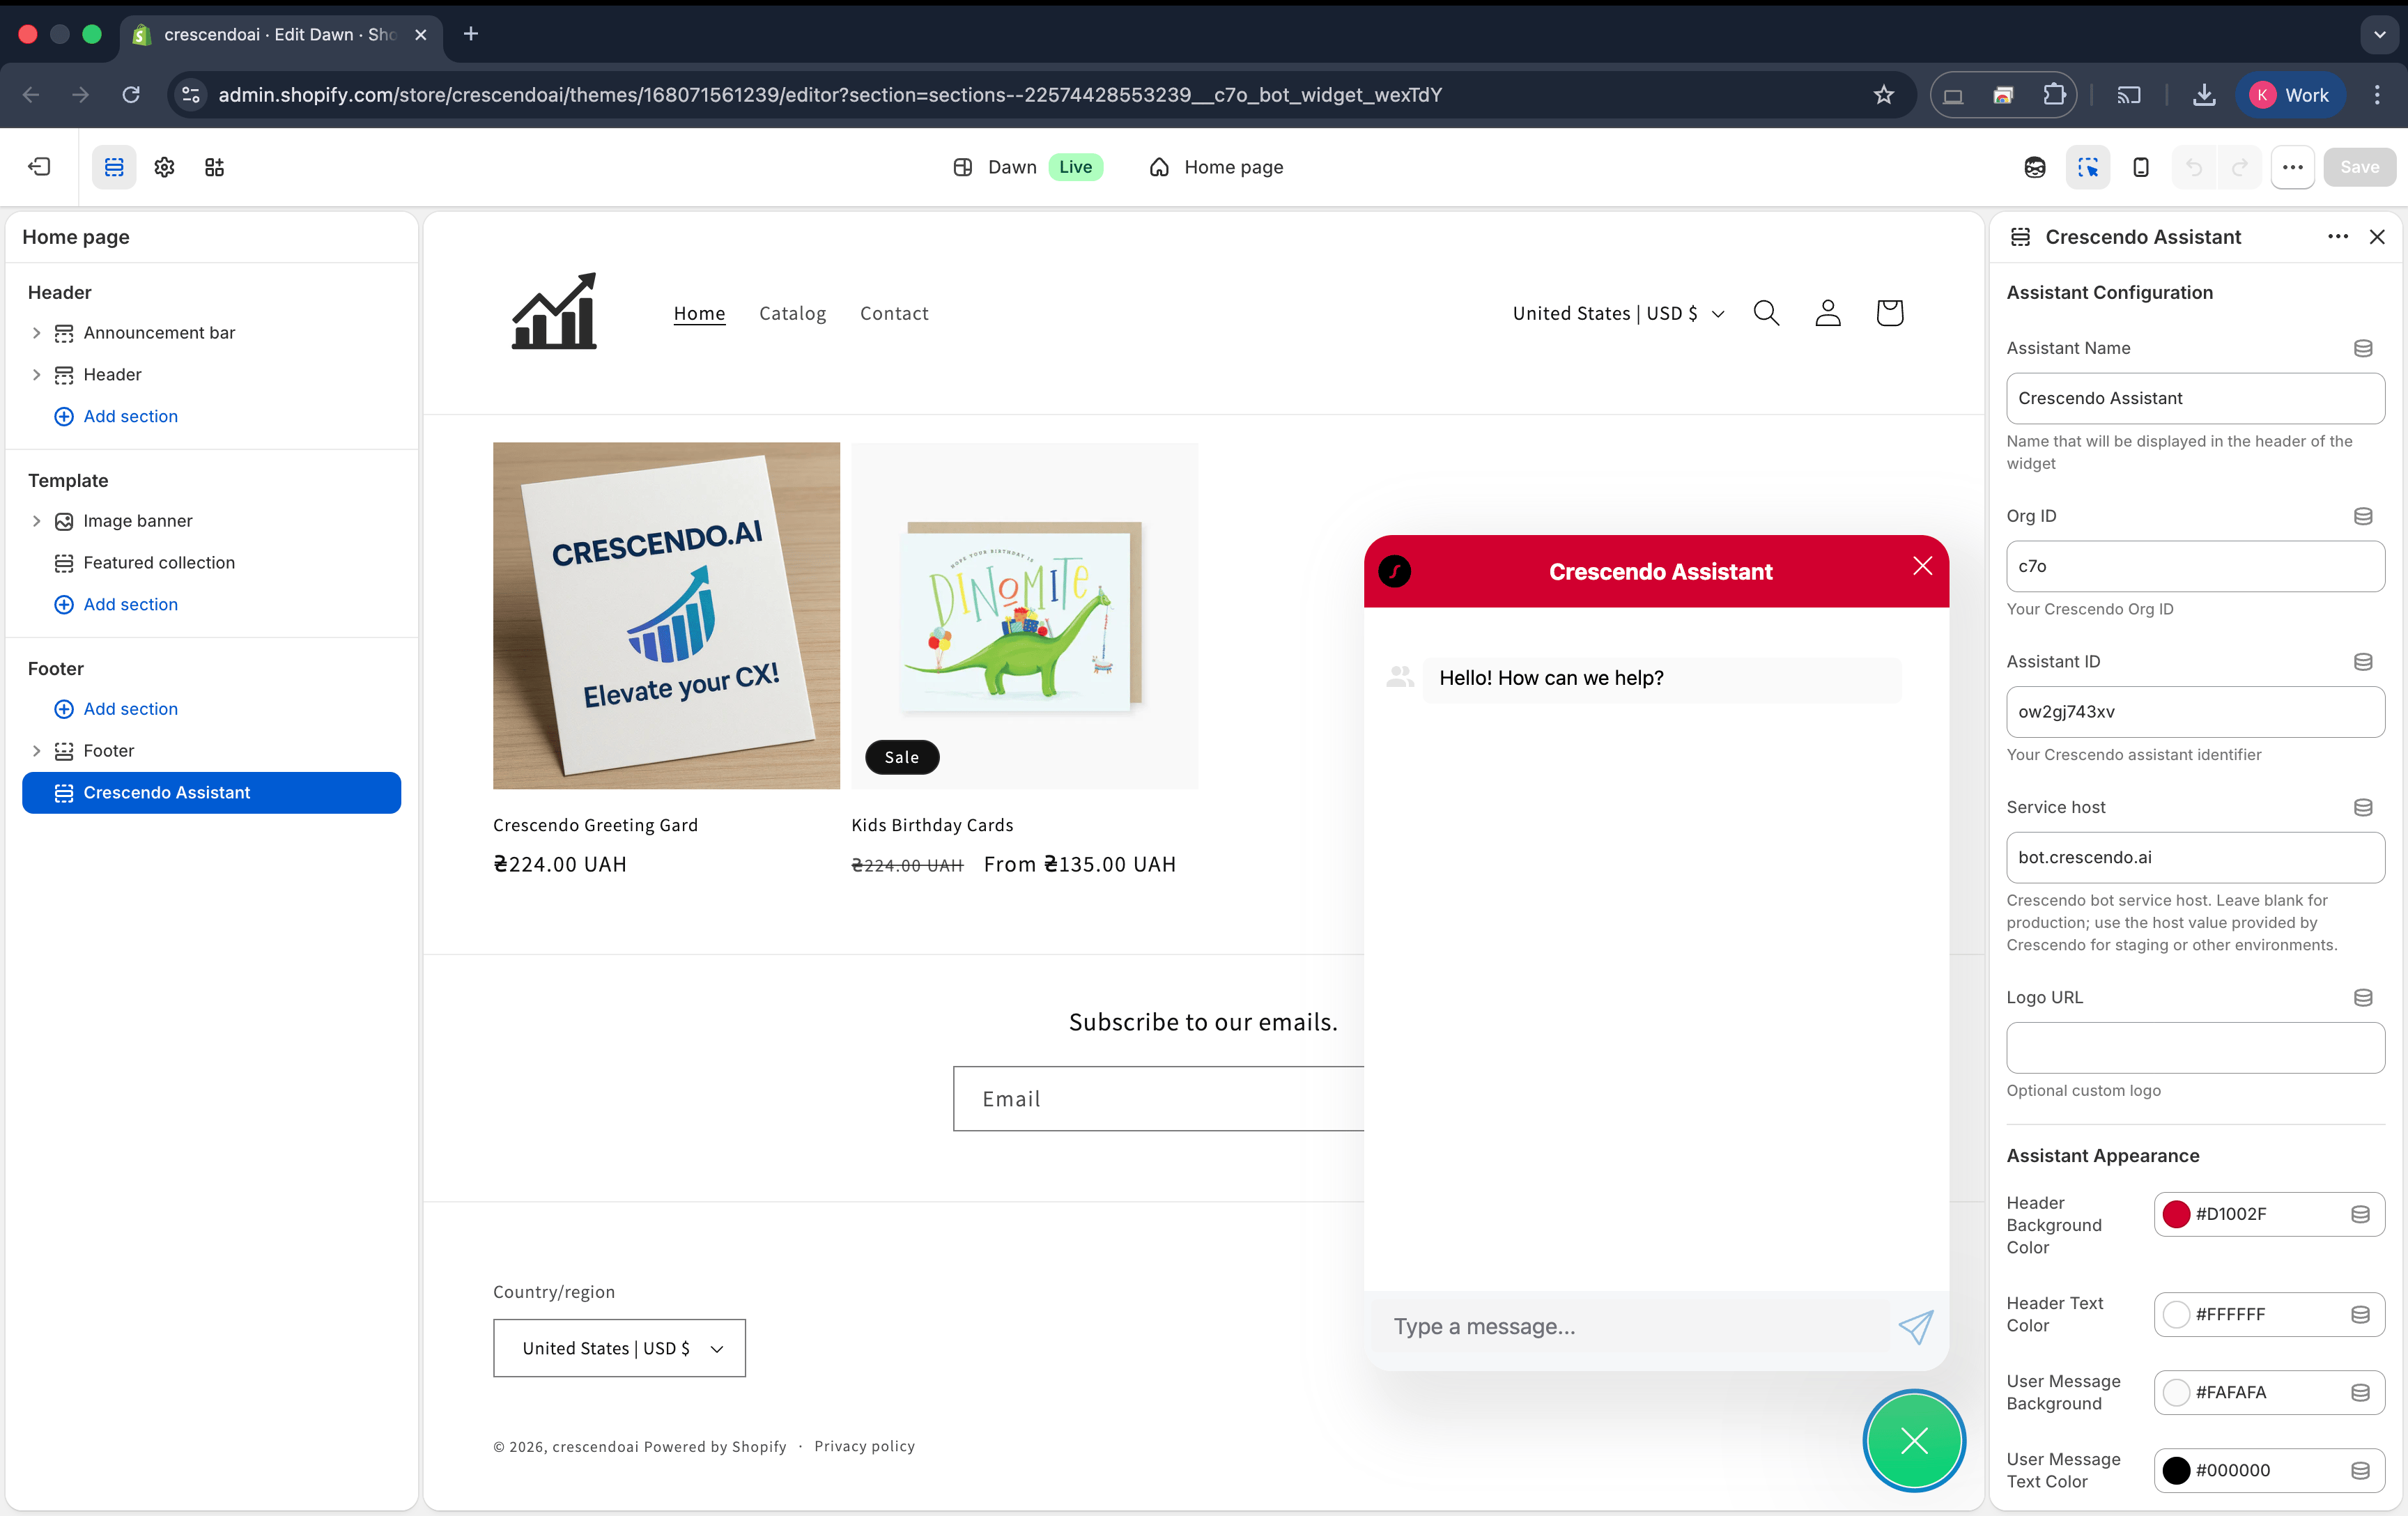
- In the Theme editor, click the Crescendo Assistant section.
- Under Assistant Configuration, paste your Org ID and Assistant ID.
- Optionally set Assistant Name and Logo URL.
- Save.
Customize colors and size (optional)
Every setting under Assistant Appearance maps to a CSS custom property:
For website installs, see Enable AI Assistant on your Website.
Advanced styling reference
Manual Liquid installs can use any supported widget CSS custom property:
Manual Liquid installs can also use
::part() selectors:
The widget renders inside a shadow DOM, so style each part through the
::part() selector on the host element:
:hover and :focus apply directly to the part. Attribute selectors must be placed on the host element, before ::part(). Descendant combinators do not cross the shadow boundary — target each part independently.
You can also configure widget attributes in manual Liquid. The Shopify snippets above use name, url, org-id, bot-id, and logo-url. Custom icon and logo attributes, such as logo-svg, popup-logo-svg, popup-logo-url, bot-icon-svg, agent-icon-svg, user-icon-svg, system-icon-svg, info-icon-svg, anchor-open-svg, anchor-close-svg, send-icon-svg, attach-icon-svg, and close-svg, require manual control.
For additional widget parameters and events, see Enable AI Assistant on your Website.
Customer context
The widget passes Shopify context to the assistant when the data is available:
When
last_order is populated, it includes:
The assistant can use this context for personalized support, order-status answers, localized responses, cart-aware shopping help, and attribution checks. Anonymous shoppers can still chat, but customer identity and order history are not available until they sign in.
If you need the assistant to use product metafields, configure product metafield definitions in the Shopify knowledge source or ask Crescendo to enable them for your store.
Attribution events
The widget listens forc7o:bot:conversationStart. When a shopper sends the first message, the snippet calls updateCartTags() and writes Crescendo attribution to the Shopify cart. The snippet also marks sessions when a shopper lands on a link that includes utm_source=crescendo.
See Shopify Attribution for Flow setup and reporting.
Troubleshooting
Widget is not showing
- App embed disabled – Ensure the Crescendo Assistant app embed is enabled in Theme settings → App embeds and the theme is saved.
- IDs are missing – For manual Liquid installations, ensure Org ID and Assistant ID are saved.
- Page rules – Check whether page rules hide the assistant on the current URL.
- Theme cache – Hard-refresh (Ctrl/⌘ + Shift + R) after saving.
Customer details are not available
Customer context is available only when Shopify already identifies the visitor as a logged-in customer. Anonymous shoppers can still chat, but the assistant will not receive email, phone, name, or order history until the shopper signs in through the store’s normal account flow.Cart ID or attribution is missing
- Confirm the storefront allows requests to
/cart.jsand/cart/update.js. - For link-click attribution, assistant product, cart, or checkout links must include
utm_source=crescendo. - See Shopify Attribution for attribution setup and verification.